
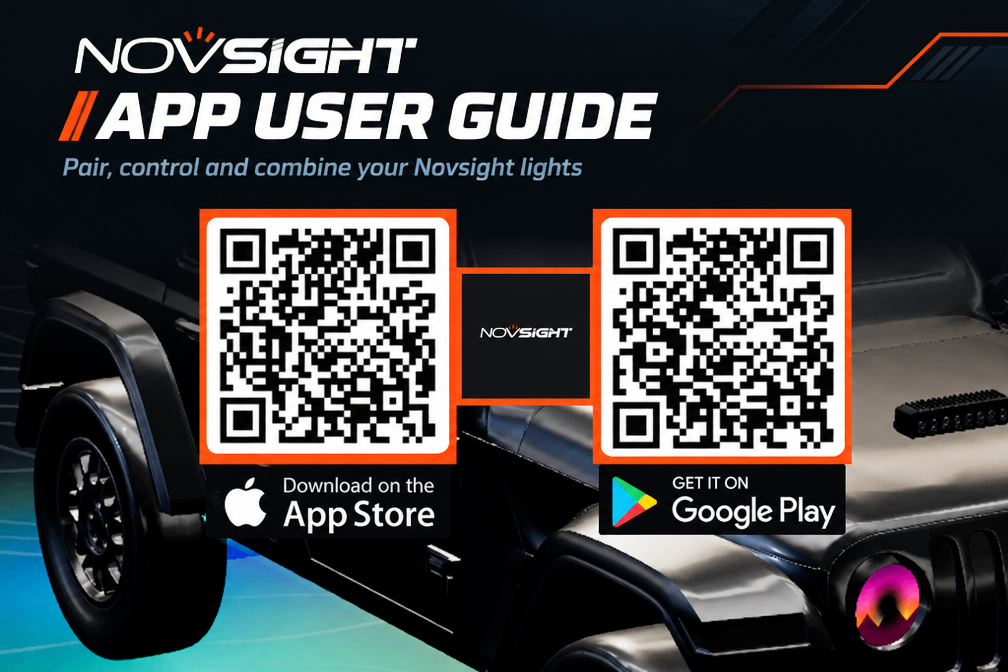
How to Use the Novsight App: A Complete Setup and User Guide
Want to get more out of your Novsight lighting system? The Novsight App lets you pair compatible devices, customize lighting effects, control multiple lights, and create personalized lighting scenes directly from your phone.
Whether you're setting up your X-7, MJ-6, Voyager, Galaxy, Underglow, or Cybereyes headlights for the first time, this guide walks you through the essential steps to get started.
Download the Novsight APP User Guide PDF File Online, please click here
Download the Cybereye Custom LED Creen Content, please click here
In this guide, you'll learn:
Note: This guide is based on Novsight App version 1.2.1 for iPhone and Android, released in October 2026. Some screens or options may differ in later versions.
1. Getting Started with the Novsight App
Create Your Account
Before connecting your lights, you'll need a Novsight account.
-
Open the Novsight App and tap Register an account on the login screen.
-
Tap Select your region and choose your country or region.
-
Enter your email address and tap Get code.
-
Enter the verification code sent to your inbox.
-
Create a password containing 6–12 characters, including both letters and digits.
-
Read and agree to the User Registration Agreement and Privacy Policy, then tap Register.
Tip: If you don't receive the verification code within one minute, check your spam folder and try requesting the code again.

Log In to Your Account
You can log in using either your password or an email verification code.
Password login:
Enter your email address and password, agree to the required terms, and tap Log in.
Email code login:
Tap Email code login, enter your email address, request a verification code, and use it to log in.

Reset Your Password
Forgot your password? No problem.
-
Tap Forgot password on the login screen.
-
Enter your email address and tap Get code.
-
Enter the verification code and your new password.
-
Tap Confirm, then log in with your new password.

Change the App Language
The Novsight App supports English, Japanese, and Simplified Chinese.(Novsight App version 1.2.1)
Before logging in, tap Switch language in the upper-right corner.
After logging in, go to Me → Switch language.
Select your preferred language and tap Confirm.

2. Explore the Home Screen
After logging in, you'll see the home screen, featuring a 3D model of your vehicle and the locations of your connected lights.
When you switch a light on or change its mode, the 3D model reflects the corresponding lighting effect.

3D vehicle with the Front / Rear /Chassis shortcuts
Navigate the 3D Vehicle Model
Use the home screen to explore your vehicle and access your lighting controls.
Rotate and zoom: Drag to rotate the vehicle and pinch to zoom.
Front, Rear, and Chassis: Tap these shortcuts to view specific areas more closely.
Camera buttons: Switch between the normal view, 360° view, and bird's‑eye view.
Add device (+): Start connecting a new compatible device.
Simulated Installation (☰): Preview lighting products and mounting positions on the 3D vehicle before purchasing or installing them. You can also change the vehicle's body color.
The home screen also displays two useful counters:
ONLINE: The number of devices currently within connection range.
LIT: The number of lights that are switched on.
Pair a light
1.Choose the type of device
2.Tap Connect next to your light
3.Pairing in progress

Shows: LIGHT NOT FOUND ?
Press and hold the light’s A and B buttons at the same time for about 10 seconds (see the light’s own manual).
The light enters pairing mode; then tap Scan again. If A light that is still bound to another account will not appear— you could delete it from that account first.
Manage Your Devices
Tap Devices at the bottom of the screen to view devices linked to your account.
Depending on the product, you can:
-Switch daytime running lights (DRLs) on or off.
-Turn the main light on or off.
-Change supported lighting modes directly from the device list.
-Tap a device to open its full control page.
-Long‑press a device row to delete it.
-Pull down on the list to refresh device connection status.
For Voyager and Galaxy lights, the device list also includes a Mode button for quickly changing the main light mode.

Control Matching Lights Together
If you have two identical lights installed as a left‑and‑right pair, such as two X‑7 lights mounted on the A‑pillars, you can use Combined control to manage them together.
Both lights will appear as one card and respond to the same commands. Select Single control if you want to operate them independently again.
Connection tip: Novsight lights that use Bluetooth must be within range of your phone. If a device appears offline, move closer and pull down on the device list to refresh its status.
3. How to Add and Connect Your Novsight Devices
Before pairing a device, make sure the light is powered on, Bluetooth is enabled on your phone, and your phone is close to the device. When prompted, allow the app to access Bluetooth.
Connect Your Novsight Spotlights
Follow these steps to pair compatible spotlights, including supported X‑7 and MJ‑6 models.
-
Open the home screen and tap the + button in the upper‑right corner.
-
Select Connect spotlights.
-
Wait approximately 15 seconds while the app searches for nearby lights.
-
Under FOUND, locate your light by its serial number (SN).
-
Tap Connect next to the correct device.
-
Keep the app open and stay close to the light while pairing and account binding complete. This usually takes 10–30 seconds.

Name Your Device and Choose Its Position
After connecting, follow the setup prompts to identify where the light is installed.
-
Under Edit device info, enter a recognizable name, such as "Left A‑pillar." You can also tap Skip to keep the default name.
-
Under Select position, choose the light's mounting location. Recommended positions are provided, and the first recommended position is selected by default.
-
Use the adjustment arrows under Fine‑tune to position the light accurately on the 3D vehicle when adjustment is available.
-
Tap Confirm. When you see Added successfully, tap Back to home.
Your new device should now appear in the device list and on the 3D vehicle model.
Important: X‑7 and MJ‑6 lights require an assigned mounting position before they can be switched on. If you skipped this step, select Assign when the app prompts you to choose an installation location.
Add a Heated Camping Chair
To connect a compatible heated camping chair:
-
Tap + on the home screen.
-
Select Connect heated camping chair.
-
Make sure the chair is powered on and close to your phone.
-
Select the chair from the discovered devices.
-
Give it a recognizable name.
Once connected, you can manage its heating settings from the app.
Connect Cybereyes Screen Headlights
Unlike Bluetooth spotlights, Cybereyes headlights connect through their own Wi‑Fi hotspot. The initial setup takes approximately two minutes and includes one power restart.
-
Switch on your Cybereyes headlights.
-
In the app, tap + → Connect Cybereyes.
-
Follow the on‑screen instructions to open your phone's Wi‑Fi settings.
-
Connect to the Wi‑Fi network whose name starts with D16. The hotspot password is displayed in the app; tap the copy icon to copy it.
-
Return to the Novsight App and wait while it initializes the headlights.
-
When Device restart required appears, switch the headlights off and then back on.
-
Keep the app open while your phone reconnects to the D16 hotspot. If it doesn't reconnect automatically, select the network again in your phone's Wi‑Fi settings.
-
When Device found displays the headlight name and Device ID, tap Confirm binding.

Your Cybereyes headlights should now appear in your device list.
Download the Cybereye Custom LED Creen Content, please click here
Jeep Wrangler Headlight Assembly Screen Specifications
Total diameter: 96 × 96 pixels;
Central cutout: 40 × 40
Physical screen resolution: 12.7 ppi (px/inch)
Master Content Production Specifications (for both video and images & GIF)
Width: 384 px
Height: 384 px
Center Cutout Specifications
Width: 160 px
Height: 160 px
(Allowed 4 times the actual resolution)
Good to know: While connected to the D16 hotspot(WiFi), your phone won't have an internet connection. The binding is sent to your account when your phone reconnects to mobile data or your normal Wi‑Fi network.
4. Customize Your Novsight Lighting
Once your devices are connected, tap a light in the device list to open its control page. The available controls depend on the product model.
X‑7: Switch Between DRL Effects and Main Lighting
The X‑7 control page includes a live 3D preview, connection status, daytime running light controls, lighting modes, and a main‑light switch.
Control the daytime running light:
-
Use the DRL switch to turn the daytime running light on or off.
-
Tap a DRL effect to apply it immediately.
-
Look for the orange dot to identify the currently selected mode.

Available X‑7 DRL modes include:
-Yellow on and White on
-Yellow breathing and White breathing
-Yellow – flow out and White – flow out
-Yellow strobe and White strobe
-Yellow – flow in and White – flow in
Control the main light:
Tap the main‑light switch at the bottom of the screen to turn it on or off. When the main light is on, a brightness slider appears.
The main light is significantly brighter than the DRL and takes priority over it.
MJ‑6: Personalize Your Full‑Color DRL
The MJ‑6 features a full‑color daytime running light with a variety of effects.
Available modes include Solid on, Solid breathing, Solid strobe, Rainbow, Color flow, Graffiti – static, Graffiti – flow, and several Color ring and gradient effects.

For modes that allow custom colors:
-
Select a mode marked with a small color dot.
-
Tap the dot to open Color adjustment.
-
Choose your preferred color on the color board.
-
Tap Confirm to apply it.
-
Tap the + button to save the color for quick reuse.
You can also switch on the main light from the control page.
Voyager and Galaxy: Choose Your Main Light and Flow Effects
Voyager and Galaxy share the same control layout and lighting modes.

Main light mode
Choose from:
-Always on (white and yellow together)
-White light only
-Yellow light only
You can change the main light mode from either the device control page or the Mode button in the device list.
DRL source: When the main light is off, choose what the lenses display: colored DRL effects, the yellow flow light, or Off.
Flow Light Mode
Available options include:
-Off
-Yellow steady
-Yellow all‑LED strobe
-Yellow fast strobe
Keep in mind that the main light takes priority over the DRL and flow‑light effects when it is switched on.
Underglow: Adjust Brightness, Speed, and Effects
Customize your vehicle's underglow using the controls on the Underglow page.

Light: Switch the underglow strip on or off.
Brightness: Adjust from 1 to 100.
Speed: Adjust from 1 to 10.
Direction: Choose forward or reverse for flowing effects.
Color: Select a color for single‑color effects.
Effects: Choose from 100 built‑in effects, labeled Mode 1 through Mode 100.
Some effects use fixed colors and cannot be customized. If the app displays "This mode uses fixed colors," the selected effect determines its color.
Heated Camping Chair: Customize Your Comfort
The Novsight App lets you control two heating zones: the backrest and the seat.
Adjust the temperature
Use the temperature dial to set your target temperature. Tap − or + to adjust by 1°C, or press and hold to change the temperature more quickly.
You can choose between
Both zones: Control the backrest and seat together.
Separately: Select Backrest or Seat and control each zone independently.
The screen also displays the current measured temperature of each zone and the chair's battery level.
Choose a preset
The available presets are:
Eco: Approximately 45°C
Outdoor: Approximately 55°C
Turbo: Approximately 65°C
Selecting a preset sets the temperature and starts heating.
Set an auto‑off timer
Drag the timer slider to select a duration from 0 to 120 minutes, in 5‑minute increments. At 0, the chair continues heating until you switch it off.
Use Heat all or Turn all off at the bottom of the screen to control both zones together.
Additional settings
Open the three‑dot menu to:
Change the temperature unit between °C and °F.
Enable or disable Remember temperature.
Delete the device.
When Remember temperature is enabled, heating starts at the temperature used last time. When disabled, it starts at the Eco level, approximately 45°C.
Cybereyes: Customize Your Headlight Screen
Cybereyes headlights let you play visual content on the headlight ring using the app's Device and Content tabs.
Your phone must be connected to the headlights' D16 Wi‑Fi hotspot while using this control page.

Device tab
Use the Device tab to:
-Adjust screen brightness under Brightness Settings.
-Turn the screen on or off using Remote control.
Restart the headlights
-Change the hotspot name and password under Wi‑Fi settings.
-Stop playback and remove programs from the headlights using Clear Programs.
-Clearing programs from the headlights does not delete the library stored on your phone.

Content tab
The Content tab is your library for headlight‑screen designs.
You can:
-Tap a saved content card to play it.
-Select New content to create content from an image, video, or text.
-Select Browse to explore ready‑made designs in the public library.
-Open a design and tap Use in a program to add it to your programs.
Choose a play mode
Single: Plays only the content card you select.
Carousel: Plays several programs in a continuous loop.
You can also use My Resource Library under the Me tab to upload a photo and have the AI create ring‑display artwork for your Cybereyes headlights. Your creations are kept in the Gallery.
5. Create Personalized Lighting Scenes
Want several lights to switch to your preferred settings with one tap? Use Scenes to combine multiple device actions into a single preset.
For example, you could create a "Camping" scene that turns on your X‑7 main light and sets your MJ‑6 to a chosen color.

Create a New Scene
-
Open the Scenes tab.
-
Tap the settings icon next to Modes.
-
Select Add personalized scene.
-
Enter a name, such as "Camping" or "Adventure."
-
Tap Add action and select a device. Devices are grouped by their mounting position.
-
Choose the desired state, such as Main light on, and tap Confirm.
-
Repeat the process for each additional device you want to include.
-
Tap Create scene.
Your personalized scene will appear in the Scenes tab.
Activate and Manage Scenes
To activate a scene, open Scenes and tap the scene you want to run. Tap it again to switch it off.
Important: Only one scene can be active at a time. Activating another scene switches the previous scene off.
To edit or delete a scene:
-
Open the Scenes tab.
-
Tap the settings icon next to Modes.
-
Select the scene you want to manage.
-
Change its name or actions and tap Save, or delete it from the same page.
With personalized scenes, you can organize your preferred lighting configurations and switch between them without adjusting every device individually.

6. Manage Your Account and App Settings
The Me tab provides access to your account information, language settings, resource library, customer support, and system settings.
Switch Languages
Select Switch language to choose English, Japanese, or Simplified Chinese.
Access the Resource Library
Open My Resource Library to upload a photo and generate AI‑created ring‑display artwork for compatible Cybereyes headlights. Your creations are saved in the Gallery.

Contact Novsight Support
Under Contact Us, you can access:
Official website: https://novsight.com
Email: service@novsight.com
Tap an entry to copy the contact information.
Submit Feedback
If you experience a problem or have a suggestion:
-
Open Me → Help and Feedback.
-
Choose a feedback type.
-
Describe the issue.
-
Attach up to six screenshots if needed.
-
Tap Submit feedback.
You can check replies under Feedback history.
Update Firmware
To check for a device firmware update:
-
Open the device's control page.
-
Tap the three‑dot menu in the upper‑right corner.
-
Select Firmware update.
-
Check the Current version.
-
If a newer version is available, tap Start update.
Keep your phone close to the light and stay on the update page until the process finishes. The light restarts automatically.
Change Your Password or Bound Email
Go to Me → System Settings → Account and Security.
You can change your password using your current password or an email verification code, and you can change the email address bound to your account.
Clear Cache or Log Out
Under System Settings:
Current version: Tap to check for an app update.
Clear cache: Removes cached data from your phone. Your devices and scenes remain in your account.
Log out: Signs you out on the current phone.
Delete Your Account
Account deletion is permanent and cannot be undone.
If you choose to proceed, read the listed consequences, select I understand the risks, continue, and confirm the deletion.
7. Novsight App Troubleshooting and FAQs
Having trouble connecting or controlling your lights? Try the solutions below.
Why Can't the App Find My Light?
Check the following:
-
Make sure Bluetooth is enabled and the app has Bluetooth permission.
-
On iPhone, check Settings → Novsight. On Android, check Settings → Apps → Novsight and allow location access as well.
-
Confirm the light is powered on and within a few metres of your phone.
-
Hold the light's A and B buttons together for approximately 10 seconds to enter pairing mode, then tap Scan again.
-
If the light is still bound to another account, remove it from that account first.
Why Does Pairing Fail or Time Out?
Move closer to the light, make sure no other phone is connected to it, and try pairing again.
Messages such as "Onboarding timed out (45s)" or "Failed to query device info" usually indicate that the Bluetooth connection was interrupted.
Keep your phone close to the device and leave the app open during pairing.
Why Does My Light Show Offline?
The device may be out of Bluetooth range or may not be powered on.
Move closer to the light and pull down on the device list to refresh the connection status. If you see "Unable to connect to the device. Please move closer and try again," retry from a shorter distance.
Why Can't I Switch On My New X‑7 or MJ‑6?
These lights require an assigned mounting position before they can be switched on.
When the app displays "Installation location not yet assigned!", tap Assign, select the installation position, and complete the setup.
Why Did Deleting a Light Fail?
If you see "Device is nearby but failed to reset to pairing mode," move closer to the light and try deleting it again.
The app must communicate with the physical light to reset it. The light needs to be reset before it can be added to another account.
What Should I Do If a Firmware Update Fails?
Your light will continue operating with its current firmware.
Stay close to the light, keep the app open on the firmware update page, and tap Start update again.
What Happens If I Am Logged Out Unexpectedly?
If you see "Your session has expired. Please log in again," simply log in again.
Your devices and scenes are stored in your account, so they are not lost when your session expires.
Still Need Help?
Download the Novsight APP User Guide PDF File Online, please click here
Download the Cybereye Custom LED Creen Content, please click here
If the problem persists, open Me → Help and Feedback to submit a description of the issue along with screenshots.
You can also email our support team at service@novsight.com.
Get More Out of Your Novsight Lighting
From pairing your first light to creating personalized scenes, the Novsight App puts your compatible lighting controls in one place.
Explore different lighting modes, fine‑tune your settings, and build configurations that suit your vehicle and your adventures.
For additional product information and support, visit Novsight.com.


Dejar un comentario
Todos los comentarios se revisan antes de su publicación.
Este sitio está protegido por hCaptcha y se aplican la Política de privacidad de hCaptcha y los Términos del servicio.